Getting your cubensis to fruit can feel like the final boss level of mushroom cultivation. You’ve done the hard work of inoculation, watched mycelium slowly colonize your substrate over weeks, and now you’re staring at a fully white cake wondering: what next? The truth is, the transition from colonization to fruiting is where most growers stumble, not because it’s impossibly difficult, but because the details genuinely matter. Small shifts in humidity, temperature, air exchange, and light can mean the difference between a tub full of healthy mushrooms and a frustrating mess of aborts or contamination. I’ve been there myself, checking on my tubs every few hours, second-guessing every decision, and learning most of my lessons the hard way. This guide is built from that experience, alongside research-backed principles, so you can skip the worst mistakes and get straight to growing with confidence. Whether this is your first attempt or you’re refining your technique after a few rough flushes, you’ll find something here that helps.
Understanding the Transition to Fruiting
The shift from colonization to fruiting isn’t a switch you flip. It’s more like a conversation you have with the mycelium, gradually changing the environmental signals until the organism “decides” it’s time to produce mushrooms. During colonization, your mycelium has been happily consuming nutrients in a warm, CO2-rich, dark environment. To trigger fruiting, you need to change several of those variables simultaneously: introduce fresh air, lower the temperature slightly, increase humidity at the surface, and provide a light cue.
Think of it this way: in nature, a mycelial network fruits when conditions suggest it’s the right moment to reproduce. That usually means a temperature drop (like autumn arriving), increased moisture (rain), and exposure to open air. Your job as a grower is to mimic those seasonal signals inside a monotub, shotgun fruiting chamber, or whatever setup you’re using.
The timing of this transition matters enormously. Rushing into fruiting before your substrate is fully colonized is one of the most common mistakes, and it often leads to contamination. On the other hand, waiting too long after full colonization can cause the mycelium to become overly dense and metabolically stressed, which sometimes reduces yields. Finding that sweet spot is what separates a good flush from a great one.
The Role of Full Colonization
Before you change a single environmental parameter, your substrate needs to be fully colonized. This means the mycelium has spread throughout the entire substrate, creating a visible white network on the surface and, ideally, throughout the interior. For most grain-to-bulk transfers using coco coir or a coir-vermiculite mix, this typically takes 7 to 14 days at colonization temperatures (around 75 to 80°F or 24 to 27°C).
How do you know it’s truly ready? Look for a surface that’s uniformly white with no visible patches of uncolonized substrate. Some growers wait an additional 2 to 3 days after the surface appears fully colonized, a period sometimes called “consolidation.” During this time, the mycelium strengthens its hold on the substrate, building a denser network that’s better equipped to resist contamination once you open the tub to fresh air.
I used to rush this step constantly. I’d see 90% colonization and think “close enough.” The result was almost always a contamination scare in one corner or a section of the tub that produced nothing while the rest fruited fine. Patience here pays off in a very literal way: more patience equals more mushrooms.
One practical tip: if you’re using a clear or translucent tub, check the sides and bottom too. Sometimes the surface looks colonized while the interior still has gaps. A fully colonized substrate will show thick white mycelium pressing against the walls of the container from multiple angles.
Environmental Triggers for Pinning
Once colonization is complete, you need to introduce the environmental changes that signal the mycelium to start forming pins, those tiny proto-mushrooms that eventually develop into full fruit bodies. The primary triggers are:
- A drop in temperature, typically from colonization temps (75-80°F) down to 70-75°F (21-24°C)
- Introduction of fresh air exchange, which lowers CO2 levels and increases oxygen availability
- Increased surface moisture and humidity, ideally 90-95% relative humidity
- A gentle light cycle, usually 12 hours on and 12 hours off
None of these triggers works well in isolation. You need the combination. I’ve seen growers who nail the humidity but forget about fresh air exchange, and their tubs just sit there producing nothing but fuzzy aerial mycelium. Others get the temperature right but keep their tubs sealed, trapping CO2 at levels that suppress pin formation.
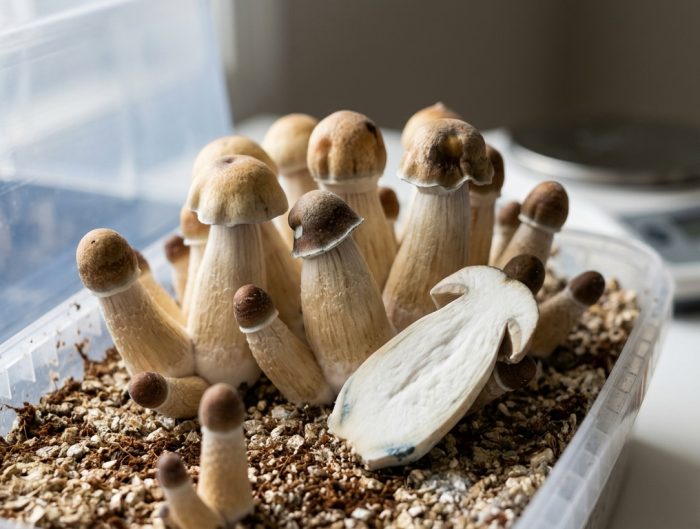
The process of pin formation, called “pinning” or “primordia formation,” usually begins 5 to 10 days after you introduce fruiting conditions for cubensis. You’ll notice tiny white bumps forming on the surface, often in clusters. These are your pins, and seeing them for the first time is genuinely exciting. Resist the urge to open the tub constantly to check on them; every time you do, you disrupt the microclimate you’ve worked to create.
Maintaining Ideal Humidity and Surface Moisture
Humidity is the single most talked-about variable in cubensis cultivation, and for good reason. Mushrooms are roughly 90% water by weight, and they pull that moisture directly from their environment. If the air around your fruiting chamber is too dry, pins will abort before they develop. If it’s too wet, you’ll create conditions that favor bacterial contamination or waterlogged caps.
The target range for relative humidity during fruiting is 90 to 95%. That sounds precise, and it is, but the good news is that most properly designed fruiting chambers maintain this range almost automatically if you set them up correctly. A monotub with a liner, proper hole placement, and a well-hydrated substrate will hold humidity in this range with minimal intervention.
What you’re really managing isn’t just the ambient humidity in the tub. You’re managing surface moisture conditions, specifically the thin layer of tiny water droplets that should be visible on the surface of your substrate. This is often described as looking like “morning dew” on grass: thousands of tiny, evenly distributed droplets. If you see pooling water, that’s too much. If the surface looks dry and matte, that’s too little.
The Importance of Fine Misting
When you need to add moisture, the tool matters. A fine mist sprayer, the kind that produces a fog-like spray rather than heavy droplets, is essential. Coarse spraying damages developing pins and can create puddles on the substrate surface where bacteria thrive.
Here’s the technique that works best: hold the sprayer about 12 to 18 inches above the substrate and spray upward or at an angle so the mist falls gently onto the surface. Never spray directly at pins or developing fruit bodies. The goal is to replenish the fine droplet layer without disturbing anything growing on the surface.
How often should you mist? That depends entirely on your setup and local climate. In a well-sealed monotub, you might only need to mist once a day or even less. In a shotgun fruiting chamber in a dry climate, you might need to mist 3 to 4 times daily. The visual cue is your guide: if the tiny droplets on the surface are disappearing, it’s time to mist.
One mistake I made early on was misting on a schedule regardless of what the surface looked like. I’d mist every 4 hours because a forum post told me to, even when the surface was already glistening with moisture. The result was oversaturation, which led to bacterial blotches on some of my caps. Learn to read your surface conditions rather than relying on a timer.
Monitoring Evaporation Rates
Here’s something that surprises many new growers: evaporation from the substrate surface is actually one of the primary triggers for pin formation. The mycelium responds to the slight drying effect of evaporation by initiating fruiting. This is why fresh air exchange and humidity are so interconnected. You need enough air movement to create gentle evaporation, but enough humidity to prevent the surface from drying out completely.
This balance is sometimes called the “evaporation sweet spot.” You want a slow, steady rate of evaporation, not a rapid drying effect. If your surface droplets disappear within minutes of misting, your FAE is too aggressive or your ambient humidity is too low. If the droplets sit unchanged for hours, there isn’t enough evaporation happening to trigger pinning.
A hygrometer placed inside your fruiting chamber can help you track relative humidity, but honestly, the visual check of surface moisture is more reliable for most home growers. Cheap hygrometers can be wildly inaccurate, sometimes off by 10 to 15%, which makes them more confusing than helpful. If you do use one, calibrate it first using the salt test method (plenty of tutorials exist for this) and treat the reading as a rough guide rather than gospel.
Temperature also affects evaporation rates. Warmer air holds more moisture and promotes faster evaporation, which is another reason why keeping your fruiting temperature in the 70-75°F range matters. It slows evaporation to a manageable pace while still supporting healthy growth.
Mastering Fresh Air Exchange (FAE)
If humidity is the most discussed variable, fresh air exchange is the most misunderstood. Many growers think of FAE as simply “letting air in,” but it’s really about managing the gas composition inside your fruiting chamber. During colonization, you deliberately allowed CO2 to build up because mycelium grows well in CO2-rich environments. During fruiting, you need to reverse that: bringing in oxygen-rich air and allowing CO2 to escape.
CO2 is heavier than oxygen and tends to settle at the bottom of your container. Without adequate air exchange, it accumulates in a layer above the substrate surface, which suppresses pin formation and causes developing fruit bodies to grow long, thin stems with tiny caps as they “reach” for oxygen. If your mushrooms look like they’re stretching toward the lid of your tub, insufficient FAE is almost certainly the cause.
Balancing Oxygen Levels and CO2 Retention
The goal isn’t to eliminate CO2 entirely. Some CO2 near the substrate surface actually helps maintain humidity and supports early pin development. What you’re after is a gradual, consistent exchange that keeps CO2 levels low enough for healthy fruiting without creating a drafty environment that dries everything out.
Think of it as a gentle breeze, not a wind tunnel. In a properly designed monotub, this happens passively through filtered holes positioned at different heights on the tub. The lower holes allow fresh air in, while the upper holes let CO2-rich, humid air escape. The natural convection created by slight temperature differences inside and outside the tub drives this exchange without any fans or manual intervention.
You can gauge whether your FAE is adequate by watching your mushrooms as they develop. Healthy cubensis fruit bodies have proportional caps relative to their stems. If you’re seeing “fuzzy feet,” that white, cotton-like mycelium growing at the base of the stems, it’s a classic sign that CO2 is too high near the substrate surface. This isn’t harmful, but it indicates you need more air exchange.
A quick fix for fuzzy feet in a monotub is to slightly increase the size of your FAE holes or remove a small amount of the polyfill or micropore tape covering them. Make changes gradually. Opening everything at once can crash your humidity and cause a wave of aborts.
Passive vs. Active Ventilation Methods
Most home growers use passive ventilation, meaning they rely on natural air movement through holes, gaps, or periodic lid fanning rather than mechanical fans. This approach works well for small-scale grows and is far more forgiving of mistakes.
Passive setups include:
- Monotubs with 2-inch holes covered in polyfill or micropore tape, typically 2 to 4 holes per side
- Shotgun fruiting chambers (SGFCs) with quarter-inch holes drilled on all six sides on a 2-inch grid pattern
- Modified tubs with flipped or cracked lids that allow air to seep in around the edges
Active ventilation uses small fans, either inside the chamber or directed at intake holes, to force air exchange on a controlled schedule. This is more common in larger or automated setups. If you go this route, use a timer to run the fan for a few minutes every hour or two, and always direct airflow away from the substrate surface to avoid drying it out.
I personally started with an SGFC and eventually moved to unmodified monotubs with the lid simply flipped upside down and set on top, leaving a small gap around the perimeter. It’s the simplest approach I’ve tried, and it produces remarkably consistent results as long as the substrate is properly hydrated at the start. The key insight I picked up from resources at Healing Dose and similar education-focused communities is that simplicity often outperforms complexity in home cultivation. Overthinking your setup introduces more variables to troubleshoot.
Whichever method you choose, the principle is the same: provide enough air exchange to keep CO2 levels manageable while preserving the humid microclimate your mushrooms need.
Temperature Control and Lighting Requirements
Temperature and light are the two variables that growers tend to either obsess over or completely ignore. The reality is somewhere in the middle: both matter, but neither needs to be controlled with laboratory precision. Getting them “close enough” is usually sufficient for healthy fruiting.
That said, temperature has a more direct impact on growth rate, contamination risk, and overall yield than many growers realize. And light, while not a primary energy source for mushrooms the way it is for plants, plays a specific role in directing growth patterns and signaling the fruiting cycle.
Optimal Temperature Ranges for Growth
For cubensis, the ideal fruiting temperature range is 70 to 75°F (21 to 24°C). This is slightly cooler than colonization temperatures, and that drop itself serves as a fruiting trigger. Within this range, you’ll see steady pin development, proportional fruit body growth, and a lower risk of contamination compared to warmer temperatures.
Going above 80°F during fruiting creates problems. Warmer temperatures accelerate bacterial growth, increase evaporation rates (making humidity harder to maintain), and can cause fruit bodies to mature too quickly, resulting in smaller mushrooms with thinner flesh. Contamination organisms like Trichoderma also thrive in warmth, so keeping things cool gives your mycelium a competitive advantage.
Going below 65°F slows growth dramatically. Pins may stall, and the time from pinning to harvest can stretch from 7 days to 14 or more. This isn’t necessarily harmful, and some growers in cooler climates simply accept slower growth, but it does extend the window during which contamination could take hold.
If you’re growing in a room without climate control, a closet or basement often provides the most stable temperatures. Avoid placing your tubs near windows, heating vents, or exterior walls where temperature fluctuates throughout the day. A simple min/max thermometer inside your growing space will help you track the range over 24 hours.
One thing I’ve noticed over multiple grows: consistency matters more than hitting an exact number. A tub that stays at a steady 73°F will generally outperform one that swings between 68°F at night and 78°F during the day, even though both averages fall within the “ideal” range. Mycelium and developing pins respond poorly to rapid temperature changes.
Light Cycles and Intensity for Directional Growth
Mushrooms don’t photosynthesize. They don’t need light for energy the way plants do. But cubensis does use light as a directional cue, a signal that tells developing fruit bodies which way is “up.” Without any light, mushrooms will still grow, but they tend to develop in random orientations, sometimes growing sideways or curling in odd directions.
A simple 12 hours on, 12 hours off light cycle using ambient room light or a low-wattage LED is all you need. You don’t need grow lights, UV lights, or anything expensive. A desk lamp with a 6500K daylight LED bulb positioned a few feet from your tub works perfectly. Some growers simply place their tubs in a room that gets indirect natural light during the day, and that’s sufficient too.
The intensity should be low, roughly equivalent to the light you’d have in a room with the curtains open on an overcast day. Direct sunlight is too intense and will heat up your tub, throwing off your temperature control. Very dim light or complete darkness won’t harm anything, but you may get less uniform growth patterns.
I’ve experimented with different light schedules and colors over the years, and the honest conclusion is that it makes very little difference as long as some light is present during the “day” portion of the cycle. The 12/12 schedule mimics natural day-night cycles and seems to promote the most organized pinning patterns, but a 10/14 or 14/10 schedule works nearly as well. Don’t stress about this variable: get your humidity and FAE right first, and treat light as a minor finishing touch.
Troubleshooting Common Fruiting Issues
Even with perfect preparation, things go sideways sometimes. Mushroom cultivation involves living organisms, and living organisms don’t always follow the playbook. The good news is that most common issues during fruiting have identifiable causes and straightforward fixes. Learning to read what your tub is telling you is one of the most valuable skills you can develop.
The two most frequent problems growers face during fruiting are aborted pins and contamination. Both can be heartbreaking after weeks of careful work, but neither has to ruin your entire grow if you catch them early and respond appropriately.
Identifying and Preventing Aborts
Aborts are pins that stop developing and die before reaching maturity. You’ll recognize them as small, dark-capped mushrooms that have stopped growing while their neighbors continue developing normally. A few aborts in any flush are completely normal, especially in the first flush. But if you’re seeing large numbers of pins aborting simultaneously, something in your environment needs attention.
The most common causes of mass aborts are:
- Sudden drops in humidity, often from opening the tub too frequently or too aggressively increasing FAE
- Temperature swings, particularly rapid drops of more than 5°F
- Substrate drying out, especially at the edges of the tub where the substrate pulls away from the walls
- Contamination beneath the surface that isn’t yet visible but is competing with the mycelium for resources
To prevent aborts, maintain stable conditions once pinning begins. This is not the time to experiment with your setup. If pins are forming and developing, keep doing exactly what you’re doing. Resist the urge to adjust your FAE holes, change your misting schedule, or move the tub to a different location.
If you do experience a wave of aborts, harvest them (they’re still perfectly viable) and then assess what changed. Did the room temperature drop because someone opened a window? Did you forget to mist for a day? Did you just modify your FAE setup? Usually the cause is traceable to a specific environmental disruption within the 24 to 48 hours before the aborts appeared.
Managing Contamination Risks During Fruiting
During colonization, your substrate was sealed and the growing mycelium provided its own defense against competitors. Once you open the tub to introduce fruiting conditions, you’re also opening it to airborne contaminants. This is why full colonization before fruiting is so critical: a fully colonized substrate has a strong mycelial “immune system” that resists most invaders.
The most common contaminant during fruiting is Trichoderma, a green mold that appears as bright green patches on the substrate surface. If you see green, don’t panic, but do act quickly. Small patches of Trichoderma can sometimes be managed by carefully removing the affected area with a clean spoon and applying a light dusting of salt or hydrogen peroxide (3%) to the spot. If the green is spreading rapidly or covers more than about 10% of the surface, it’s usually best to harvest whatever mushrooms are present and retire the tub.
Prevention is always better than treatment. Here are practical steps that reduce contamination risk during fruiting:
- Wash your hands thoroughly before any interaction with your tub
- Use filtered FAE holes (polyfill or micropore tape) to prevent airborne spores from entering
- Keep your growing space clean, don’t store your tubs near trash, compost, or houseplants
- Maintain proper humidity without creating standing water, which becomes a breeding ground for bacteria
- Use a liner in your tub to prevent a microclimate from forming between the substrate and tub walls
At Healing Dose, we emphasize a safety-first approach to every aspect of this practice, and contamination management is no exception. If a tub is heavily contaminated, disposing of it is the responsible choice. Trying to salvage a badly infected grow risks spreading contaminants to your growing space and future projects.
Maximizing Yields Through Multiple Flushes
Your first harvest isn’t the end of the story. A well-prepared substrate can produce multiple flushes, typically 3 to 5, with each successive flush generally producing fewer but sometimes larger fruit bodies. Getting multiple flushes from a single tub dramatically increases your total yield and makes the entire process more efficient.
After harvesting your first flush, the substrate will look rough. It’ll be pockmarked with holes where mushrooms were removed, and it may appear dried out or depleted. Don’t worry. The mycelial network beneath the surface is still alive and capable of producing more mushrooms with a little encouragement.
The process of preparing for subsequent flushes is called “rehydration” or “dunking.” Here’s how it works: after harvesting all mature mushrooms and any aborts from the first flush, submerge the entire substrate block in clean, cold water for 12 to 24 hours. Some growers place the tub in a larger container and fill it with water; others carefully remove the substrate block (this is where a liner helps enormously) and soak it in a clean bucket.
Cold water, around 35 to 45°F, seems to work best. The cold temperature serves as an additional fruiting trigger, mimicking the natural temperature drop that would occur after a rainstorm in autumn. After soaking, drain the excess water, return the substrate to the tub, and resume your normal fruiting conditions. Pins for the second flush typically appear within 5 to 10 days.
Each flush draws nutrients from the substrate, so yields naturally decline over time. Your first flush is usually the most productive, with the second flush close behind. By the third or fourth flush, you’ll notice smaller clusters and longer intervals between harvests. When the substrate stops producing pins after rehydration, or when contamination finally takes hold, it’s time to retire the tub and start fresh.
Here are a few tips for maximizing flush productivity:
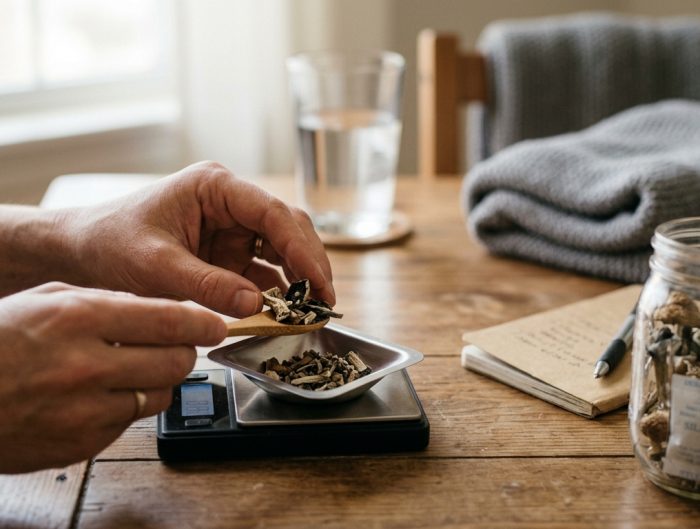
- Harvest mushrooms just before or as the veil beneath the cap begins to tear, this preserves the substrate’s energy for future flushes rather than allowing spore production to drain resources
- Don’t leave stumps behind when harvesting; twist and pull gently to remove the entire fruit body, base included
- Between flushes, keep the substrate in a cool, dark place during the rehydration soak, then return to standard fruiting conditions afterward
- If your substrate develops dry, cracked areas between flushes, focus your misting on those spots during the next fruiting cycle
Some growers report getting a surprising fifth or even sixth flush from particularly well-prepared substrates, though yields at that point are usually modest. The quality of your initial substrate preparation, especially the moisture content and nutritional composition, has the biggest impact on how many productive flushes you’ll get.
Growing With Patience and Purpose
Dialing in the right conditions for cubensis fruiting is genuinely a skill that improves with practice. Your first grow teaches you the basics. Your fifth grow teaches you the nuances. And somewhere along the way, you develop an intuition for reading your tubs that no guide can fully capture. The variables we’ve covered here, humidity, fresh air exchange, temperature, light, contamination management, and flush cycling, form the foundation, but your own observations and adjustments are what bring it all together.
Keep a journal. Write down what you did, what happened, and what you’d change next time. This kind of reflective practice, something we encourage for all aspects of intentional personal growth at Healing Dose, turns each grow into a learning experience rather than just a pass-or-fail event. Over time, your notes become your most valuable resource.
If you’re also exploring microdosing as part of your personal growth practice and want to find a gentle starting range based on your goals and sensitivity, our short quiz can help you approach that process thoughtfully and at your own pace. Take the quiz here.
You’ve got this. Start simple, stay patient, and trust the process.
You might also like