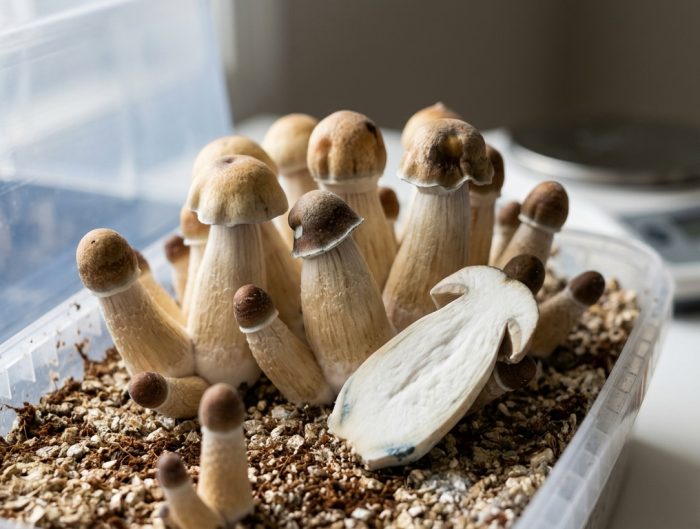
Freshly picked mushrooms are about 90% water by weight, which means that without proper drying, you’re essentially storing a ticking clock of decay. Whether you’re working with gourmet culinary varieties or psilocybin-containing species for personal exploration, understanding how to dry shrooms correctly is the single most important skill for preserving what you’ve grown or foraged. Get it wrong, and you’ll lose potency, invite mold, or end up with a spongy mess that belongs in the compost bin. Get it right, and your dried mushrooms can remain stable for months, even years. This guide walks you through every stage of the process: from the moment you harvest to the day you seal them away for long-term keeping. We’ll cover the methods that actually work, the mistakes that ruin batches, and the environmental details most people overlook. If you’re new to this, don’t worry. By the end, you’ll have a clear, repeatable process you can trust.
Why Proper Drying is Critical for Potency and Safety
Mushrooms begin degrading the moment they’re separated from their substrate. Enzymatic activity, bacterial colonization, and oxidation all kick in within hours. If you’ve ever left a fresh portobello on the counter for a few days, you’ve seen this in action: the flesh darkens, softens, and starts to smell off. The same process happens with psilocybin-containing mushrooms, but with an added cost. The active compounds, primarily psilocybin and psilocin, are vulnerable to heat, oxygen, and moisture. Psilocin in particular is notoriously unstable, breaking down rapidly when exposed to air and warmth.
This is why speed matters. The faster you remove water from the tissue, the less time these degradation pathways have to work. A mushroom that sits in a plastic bag for 48 hours before drying will already have lost a measurable percentage of its active content compared to one dried within hours of harvest. Research published in the Journal of Psychoactive Drugs has consistently shown that storage conditions, especially moisture content, are the primary factor in long-term potency retention.
Beyond potency, there’s the straightforward safety concern. Mushrooms with residual moisture above roughly 10% become breeding grounds for mold and bacteria. Some of these organisms produce mycotoxins that are invisible to the naked eye but can cause serious gastrointestinal distress or worse. You might look at a slightly bendy dried mushroom and think it’s fine, but that flexibility often signals enough trapped moisture to support microbial growth over time. The goal isn’t just “dry.” The goal is cracker-dry: brittle enough to snap cleanly between your fingers with zero flex.
There’s also the matter of dosing consistency. If you’re working with psilocybin mushrooms for microdosing or intentional personal growth, accurate dosing depends on a stable, uniform product. A batch where some specimens are 5% moisture and others are 15% means wildly inconsistent experiences, even if you weigh everything carefully. At Healing Dose, we emphasize that thoughtful preparation is the foundation of any safe practice, and drying is where that preparation starts.
One more thing worth understanding: the relationship between drying method and potency isn’t just about speed. It’s also about temperature. Psilocybin begins to degrade more rapidly above approximately 70°C (158°F), though some loss occurs at lower temperatures with prolonged exposure. This means that while you want to dry quickly, you also can’t just blast your mushrooms with high heat and call it done. The best approaches balance airflow, moderate warmth, and time.
Think of proper drying as the bridge between a successful grow and a reliable long-term supply. Skip this step or do it carelessly, and everything upstream, all the effort you put into cultivation, substrate preparation, and patience, gets undermined. Treat it with the same attention you gave the rest of the process, and you’ll have a product you can trust for months to come.
The Pre-Drying Preparation Process
Before you place a single mushroom in a dehydrator or desiccant chamber, there’s prep work that directly affects your final product. Skipping this stage is one of the most common mistakes beginners make, and it leads to uneven drying, trapped contaminants, and unnecessary potency loss.
Cleaning and Trimming Substrate
Freshly harvested mushrooms almost always have substrate material clinging to their bases. This might be vermiculite, coir, grain, or whatever growing medium you used. Leaving this material attached creates two problems. First, substrate holds moisture like a sponge, which means the base of the mushroom will dry far more slowly than the cap and upper stem. Second, substrate particles can harbor contaminants, including competing molds and bacteria that you definitely don’t want sealed into a storage container.
Use a clean, sharp knife or small scissors to trim the base of each mushroom where it meets the substrate. You don’t need to be surgical about it: just remove the visibly dirty or clumped section. Some growers like to use a soft brush, like a clean pastry brush or even a new toothbrush, to gently sweep away loose particles from the cap and stem. Avoid washing mushrooms with water. This sounds counterintuitive if you’re used to rinsing grocery store mushrooms before cooking, but adding water to something you’re about to dry is working against yourself. The tissue will absorb that water, extending drying time and increasing the window for degradation.
If you notice any specimens with unusual discoloration, an off smell, or visible mold that isn’t typical of the species, set those aside. It’s better to lose one or two mushrooms than to contaminate an entire batch during storage. Trust your instincts here: if something looks wrong, it probably is.
Pre-Drying with Air Circulation
Once your mushrooms are trimmed and cleaned, the next step is a pre-drying phase that many guides skip entirely. This is especially useful if you’ve harvested a large flush and can’t fit everything into your dehydrator at once, or if you simply want to give the process a head start.
Lay your mushrooms out on a wire rack, a mesh screen, or even a clean baking cooling rack. The key is airflow beneath and around each specimen: don’t lay them flat on paper towels or a solid surface, because the underside will trap moisture and dry unevenly. If you have a small desk fan or clip fan, point it toward the rack on a low setting. You’re not trying to blast them, just keep air moving.
In a room with decent airflow and low humidity (below 55%), mushrooms will lose a significant portion of their surface moisture within 6 to 12 hours. You’ll notice them visibly shrinking and the caps becoming slightly wrinkled. This pre-drying step reduces the total time needed in your primary drying method, which in turn means less heat exposure and better potency preservation.
A few practical notes: keep the pre-drying area clean and away from direct sunlight. UV light degrades psilocybin, and dust or pet hair settling on your mushrooms isn’t ideal. A closet with a fan works surprisingly well. If your environment is humid, say above 60% relative humidity, the pre-drying step becomes less effective, and you may want to move directly to a dehydrator or desiccant setup.
Don’t leave mushrooms in this pre-drying stage for more than 24 hours. The goal is to remove surface moisture, not to complete the entire drying process with ambient air alone. After this phase, your mushrooms should feel noticeably lighter and drier to the touch, but they won’t yet be cracker-dry. That’s what the next step is for.
Primary Drying Methods for Best Results
This is where the real work happens. You have several options, and the right choice depends on your budget, batch size, and environment. I’ll walk through each method honestly, including the one that most people try first but probably shouldn’t rely on.
Using a Food Dehydrator for Cracker-Dry Consistency
A food dehydrator is the gold standard for drying mushrooms at home, and for good reason. These appliances are specifically designed to circulate warm, dry air evenly across multiple trays, which is exactly what you need. They’re affordable, with reliable models available for $40 to $80 in 2026, and they produce consistent results batch after batch.
Set your dehydrator to a temperature between 40°C and 55°C (roughly 105°F to 130°F). This range is warm enough to drive off moisture efficiently but cool enough to minimize thermal degradation of active compounds. Some people push the temperature higher to speed things up, but the potency trade-off isn’t worth the time saved. Patience pays here.
Arrange your mushrooms in a single layer on each tray, leaving space between specimens so air can circulate freely. Larger mushrooms benefit from being sliced in half lengthwise: this exposes more surface area and dramatically reduces drying time. Caps and stems dry at different rates, so if you’ve separated them, check each type independently.
Most batches reach cracker-dry status within 6 to 10 hours, depending on the size of the specimens, how much pre-drying you did, and the ambient humidity in your space. Check progress every couple of hours. You’re looking for mushrooms that snap cleanly when bent: no flexibility, no sponginess, no soft spots. If any part of the mushroom bends without breaking, it needs more time.
One common mistake is overloading the trays. When mushrooms are piled on top of each other, the ones in the middle stay moist far longer, and you end up with an uneven batch. If you’ve harvested a large flush, dry in multiple rounds rather than cramming everything in at once.
The Desiccant Chamber Technique
If you don’t own a dehydrator, or if you want to bring already fan-dried mushrooms to true cracker-dry status, a desiccant chamber is your best friend. This method uses a hygroscopic material, most commonly silica gel or anhydrous calcium chloride (sold as DampRid in most hardware stores), to pull remaining moisture from the mushrooms in an enclosed space.
Here’s how to build a simple desiccant chamber:
- Place a layer of your chosen desiccant in the bottom of an airtight container. A plastic storage bin with a snap-on lid works well.
- Cover the desiccant with a barrier that prevents direct contact with the mushrooms. A wire rack, a piece of cardboard with holes punched in it, or a small elevated platform all work.
- Place your partially dried mushrooms on top of the barrier.
- Seal the container and leave it undisturbed for 24 to 72 hours.
The desiccant will gradually absorb the remaining moisture from the mushrooms. You can check progress by opening the container briefly and testing a mushroom for snap. If it bends, reseal and wait longer. If your desiccant has become saturated (silica gel beads change color when spent), replace it with fresh material.
This method is slower than a dehydrator but requires no electricity and produces excellent results. It’s particularly useful as a finishing step: run your mushrooms through a dehydrator first to remove the bulk of the moisture, then transfer them to a desiccant chamber for the final push to true cracker-dry. This two-stage approach is what many experienced cultivators swear by.
Air Drying Limitations and Risks
Air drying, meaning simply leaving mushrooms out in ambient conditions with a fan, is the method most beginners try first because it requires no special equipment. And while it can work as a pre-drying step (as we discussed earlier), relying on it as your sole drying method is risky.
The fundamental problem is that air drying depends entirely on your environment. If you live in a dry climate with humidity consistently below 40%, you might get acceptable results over several days. But if your humidity is above 50%, and it is for most people during much of the year, you’ll hit a wall. The mushrooms will lose surface moisture and feel drier, but they’ll plateau at a moisture content that’s still too high for safe long-term storage. They’ll bend instead of snap, and that residual moisture is enough to support mold growth once you seal them up.
I’ve seen too many people lose entire batches this way. They air-dry for a few days, think the mushrooms feel “dry enough,” seal them in a jar, and open it a week later to find white fuzz growing on everything. The lesson is painful and wasteful.
If air drying is truly your only option, here’s how to give yourself the best chance: use a fan running continuously, keep the room as cool and dry as possible, slice larger mushrooms to increase surface area, and plan to finish the process with a desiccant chamber. Don’t skip that last step. Air drying alone almost never achieves cracker-dry status in typical home environments.
Testing for Desired Dryness Levels
You’ve run your mushrooms through a dehydrator, maybe followed up with a desiccant chamber, and they look done. But how do you actually confirm they’re dry enough? This is a step that separates people who store mushrooms successfully for a year from those who open a jar of mold three weeks later.
The snap test is your primary tool. Pick up a dried mushroom and bend it between your fingers. If it snaps cleanly, like a dry twig, with a crisp break and no flexibility, you’re in good shape. If it bends at all, even slightly, before breaking, there’s still too much moisture inside. Put it back in the dehydrator or desiccant chamber.
Pay special attention to the thickest parts of the mushroom, particularly where the stem meets the cap. This junction is the densest area and the last place to fully dry. A cap that snaps perfectly might still be attached to a stem base that has a slightly rubbery core. Break a few specimens open and check the interior: it should be uniformly dry throughout, with no darker or softer spots in the center.
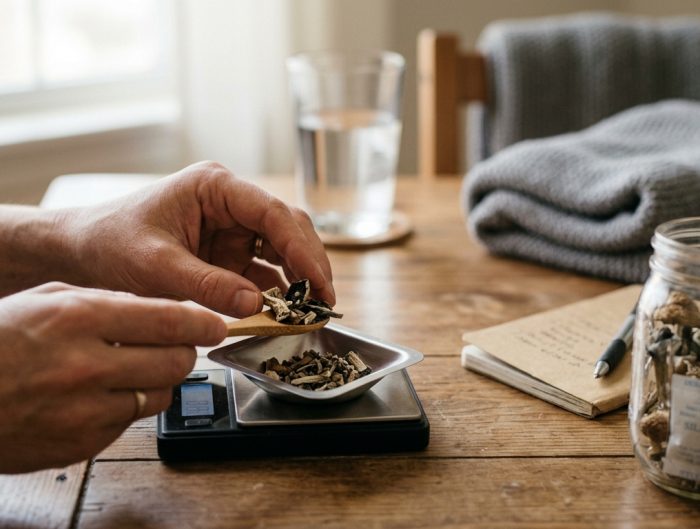
For those who want to be precise, you can use a kitchen scale to track weight over time. Weigh a sample batch before drying and then periodically during the process. Properly dried mushrooms typically weigh about 8 to 10% of their fresh weight. If a batch of fresh mushrooms weighed 100 grams, you’re looking for a final weight of roughly 8 to 10 grams. If you’re significantly above that range, more drying is needed.
Some people use small digital hygrometers placed inside their storage containers as a final check. Seal a hygrometer in with your dried mushrooms for 24 hours. If the reading stays below 30% relative humidity inside the sealed container, you’re golden. If it creeps above 40%, the mushrooms are releasing moisture and need more time. These small hygrometers cost just a few dollars and can save you from a lot of heartbreak.
When in doubt, dry longer. There’s essentially no downside to over-drying mushrooms (within reasonable temperature limits), but there’s enormous downside to under-drying them. An extra few hours in the dehydrator costs you nothing. A moldy batch costs you everything.
Optimizing Environmental Conditions for Storage
Getting your mushrooms cracker-dry is only half the battle. How you store them determines whether they stay that way. The enemies of dried mushrooms are the same enemies of most preserved foods: moisture, oxygen, light, and heat. Control all four, and your dried mushrooms can retain their integrity and potency for a year or more.
Airtight Containers and Vacuum Sealing
The single most important storage factor is keeping moisture out. Even perfectly dried mushrooms will reabsorb moisture from the air if left exposed, and it doesn’t take much to push them back above the danger threshold. Every time you open a container, you’re introducing ambient humidity.
Mason jars with new, undamaged lids are the most popular choice for home storage, and they work well. Make sure the seal is intact and the lid closes tightly. For extra protection, toss a small packet of food-grade silica gel desiccant into each jar. These packets act as a moisture buffer, absorbing any stray humidity that enters when you open the jar. You can buy them in bulk online for very little money, and they’re reusable: just dry them out in an oven periodically.
Vacuum sealing takes things a step further by removing not just moisture but also oxygen from the storage environment. A basic vacuum sealer with bags costs around $30 to $50 and is one of the best investments you can make for long-term storage. Vacuum-sealed mushrooms stored in a cool, dark place can remain potent and mold-free for well over a year. If you’re storing large quantities, divide them into smaller portions before sealing so you only expose one portion at a time when you need to access your supply.
A few storage options to avoid: plastic zip-lock bags (they’re not truly airtight and allow slow moisture exchange), paper bags (zero moisture barrier), and any container that’s been previously used for strong-smelling foods (dried mushrooms can absorb odors).
Light, Heat, and Moisture Protection
Even inside an airtight container, where you keep that container matters. UV light breaks down psilocybin over time, so transparent glass jars should be stored in a dark location: a closet, a drawer, a cabinet, or a box. If you prefer to keep jars on a shelf, wrapping them in aluminum foil or using amber-colored glass provides meaningful UV protection.
Temperature plays a quieter but equally important role. Chemical degradation reactions slow down at lower temperatures, which is basic chemistry. Room temperature storage (around 20°C or 68°F) is fine for storage periods up to six months. For longer preservation, a cool basement, a dedicated mini-fridge set to around 4°C (39°F), or even a freezer can extend shelf life significantly. If you freeze dried mushrooms, make absolutely sure they’re cracker-dry first: any residual moisture will form ice crystals inside the tissue, rupturing cell walls and accelerating degradation when thawed.
Humidity in your storage environment matters even with airtight containers, because no seal is perfect over very long periods. If you live somewhere humid, storing your containers in a climate-controlled room rather than a garage or shed makes a real difference. A relative humidity below 50% in the storage area is ideal.
One approach that works well for people who are serious about long-term storage: vacuum-seal individual doses or small batches, place the sealed bags inside a mason jar with a desiccant packet, and store the jar in a cool, dark closet. This layered approach provides redundant protection against all four degradation factors. It might sound like overkill, but when you open a bag six months later and everything is still perfectly dry and potent, you’ll be glad you took the extra five minutes.
Signs of Spoilage and When to Discard
Even with careful drying and storage, things can go wrong. Maybe your seal wasn’t as tight as you thought, or a batch wasn’t quite as dry as it seemed. Knowing how to identify spoilage is just as important as knowing how to prevent it, because consuming contaminated mushrooms can cause genuine harm.
The most obvious sign is visible mold. This typically appears as white, green, or black fuzzy growth on the surface of dried mushrooms. Don’t confuse this with the naturally white, wispy mycelium that sometimes appears on fresh mushrooms before harvest: dried mushrooms should have no fuzzy growth whatsoever. If you see mold on even one mushroom in a container, discard the entire batch. Mold produces microscopic spores that spread throughout an enclosed space, so the apparently clean specimens in the same jar are likely contaminated too.
Smell is another reliable indicator. Properly dried mushrooms have a mild, earthy, slightly nutty aroma. If you open a container and get hit with a sour, ammonia-like, or musty smell, something has gone wrong. Trust your nose here: it’s remarkably good at detecting microbial activity.
Texture changes are the subtlest warning sign. If mushrooms that were previously cracker-dry have become flexible or leathery, they’ve absorbed moisture. This doesn’t necessarily mean they’re contaminated yet, but they’re on borrowed time. You can attempt to re-dry them immediately in a dehydrator and then inspect carefully for any signs of mold. If they’ve been soft for more than a day or two in a sealed container, though, I’d err on the side of discarding them.
Discoloration beyond what’s normal for the species can also signal problems. Darkening or blackening of tissue that was previously a lighter color may indicate oxidation or bacterial activity. Some color change is normal during drying, but dramatic shifts during storage are a red flag.
Here’s a principle that’s served me well over the years: if you’re unsure whether something is safe, throw it out. The cost of a lost batch is always less than the cost of a bad experience or a health scare. Growing or acquiring more mushrooms is straightforward. Recovering from food poisoning caused by mycotoxins is not.
One practical habit that helps: label every container with the date it was sealed and the drying method used. This gives you a reference point for how long something has been stored and helps you identify patterns if you do encounter spoilage. If you notice that batches dried with a particular method tend to go bad faster, that’s valuable information for refining your process.
At Healing Dose, we talk a lot about the importance of intentionality and care in every step of the process, from cultivation through integration. Proper drying and storage are part of that same ethos. Rushing through these steps or cutting corners undermines the thoughtful approach that makes this practice meaningful. Taking the time to do it right is itself a form of respect for the process and for yourself.
Making Your Dried Mushrooms Last
The difference between a batch that’s still perfect after a year and one that’s garbage after a month almost always comes down to the details covered in this guide. Dry quickly, dry thoroughly, test for cracker-dry snap, and store with layered protection against moisture, light, heat, and oxygen. These aren’t complicated steps, but each one matters.
If you’re new to this, start with a food dehydrator and mason jars with desiccant packets. That combination handles 90% of what you need. As you gain experience, you can experiment with vacuum sealing, desiccant chambers, and cold storage to push shelf life even further. The process gets easier and more intuitive with each batch.
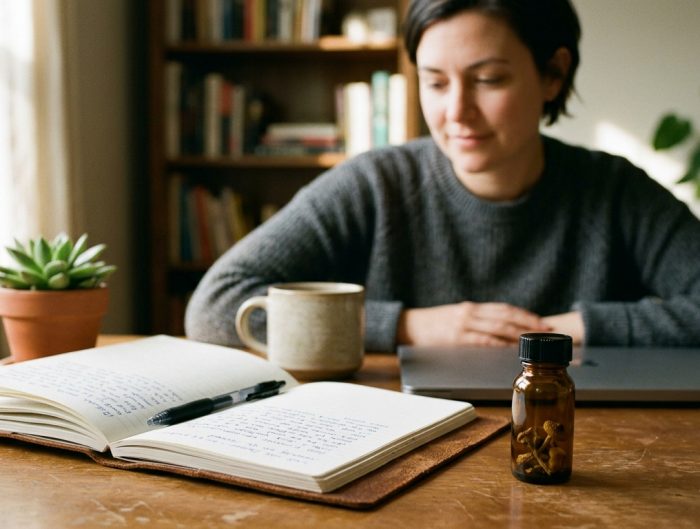
For those of you exploring psilocybin mushrooms as part of a microdosing practice, consistent drying is the foundation of consistent dosing. You can’t accurately measure what isn’t uniformly dried. If you’re curious about finding a starting dose that matches your goals and sensitivity, take the quiz at Healing Dose to get a personalized gentle starting range. It’s a small step that helps you approach the practice thoughtfully and at your own pace.
Whatever your reason for preserving mushrooms, the care you put into drying them reflects the care you bring to the entire process. Take your time, trust the snap test, and don’t cut corners on storage. Your future self will thank you.
You might also like